CRISTY DUNN FINE ART
  • HOME
  • WORKS
  • PURCHASE
  • ABOUT
  • BLOG
  • SHOWS AND EVENTS
  • Classes
    • Landscape Painting
    • Trompe L'oeil Online
    • Painting Water in the Landscape
    • Portraits in the Style of the Old Masters
  • Murals
    • Clarence "Tom" Ashley
    • Birth of a Ballad: The Capture of Tom Dooley
    • First Sunrise: Fred Price, Clint Howard, and Sons
    • Historic 1925 Fiddler's Convention
  • CONNECT
  • PORTRAITS

Fundamentals of Painting and Drawing: Class Resources (beginning with class 5 for now)...

Class #5: Mixing complementary colors and sketching your still life on canvas

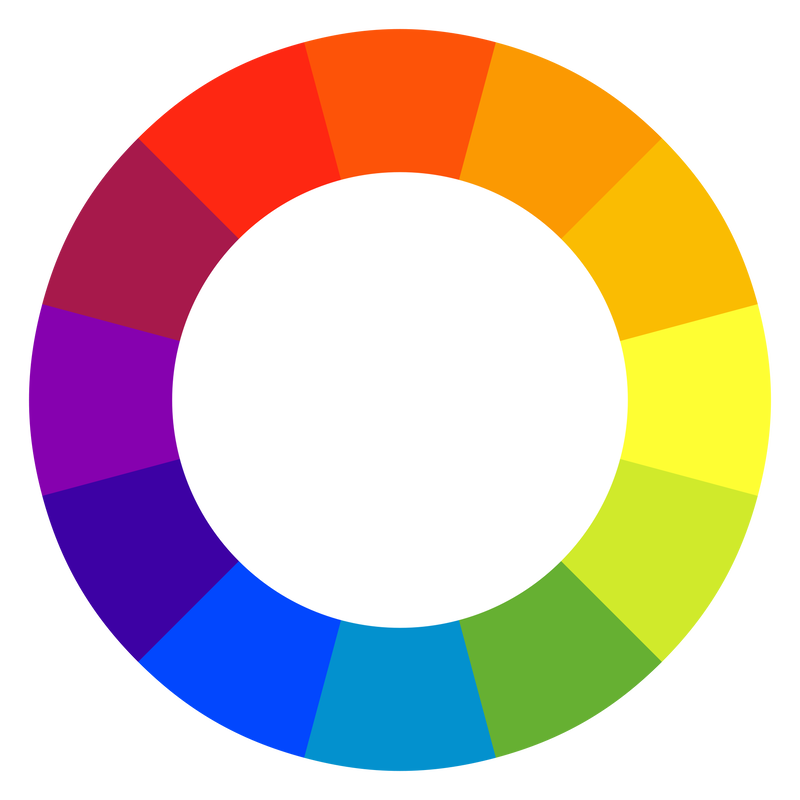
First, we will do a warm up exercise in which we create a gradation of color using a primary and its opposite on the color wheel.
First, choose a color and find it's opposite on the color wheel. You could choose the complementary pair blue and orange, the red and green complementary pair, or the yellow and purple pair. We will use red and green for the example here. 
Begin with your color on the left and its opposite on the right of a strip of paper. In our red and green example, we will paint red on the left, green on right, then moving back to the left, we will  gradually mix a little more green with the red in each successive block until we end up with almost all green on the right. The middle block should be equal parts red and green. We almost never use a color straight out of a tube, and this exercise will begin to give you some insight into mixing natural colors.

Picture
Picture

On to your real project, the still life painting! Today, you will sketch your composition onto your canvas using charcoal or thinned paint. You may apply the grid method, or you may choose to judge your proportions by measuring objects against one another. You goal for today's class should be a completed sketch. Be sure to outline value changes as well as objects.


Class #6: Finally time to Paint!!!

We will begin with a few warm up exercise to help you build insight and confidence.

First, pick a color. Stick with your color through this whole exercise. Mix your color with white to create a tint.
Mix your color with black to create a shade.
Mix your color with grey to create a tone.

Finally, (this part is not in the video above) mix your color with it's opposite on the color wheel to create a neutral color. How does the neutral you created compare to the tone?

You'll gain confidence when you prove to yourself that you can mix complex colors using only the primaries. Most people believe that the colors of human skin are the most difficult colors to mix. This is our final exercise... mixing these complex skin tones. 

Now, on to our real project, the still life painting.
Your still life will be painted in three layers. Today, you will apply the first layer. Use thin paint for your first layer. First, block in the large objects and major shadow areas... again, using thin paint. Today's goal should be to cover the entire surface of the painting with a thin layers of color. You should still be able to see through most of the paint to the sketch underneath.​ You will want to leave out any objects that clutter up the background in your reference picture. Choose a color that works well with the objects in your still life for the background. It could be black, white, a light neutral shade, or even a solid bright color. 

Picture
Picture
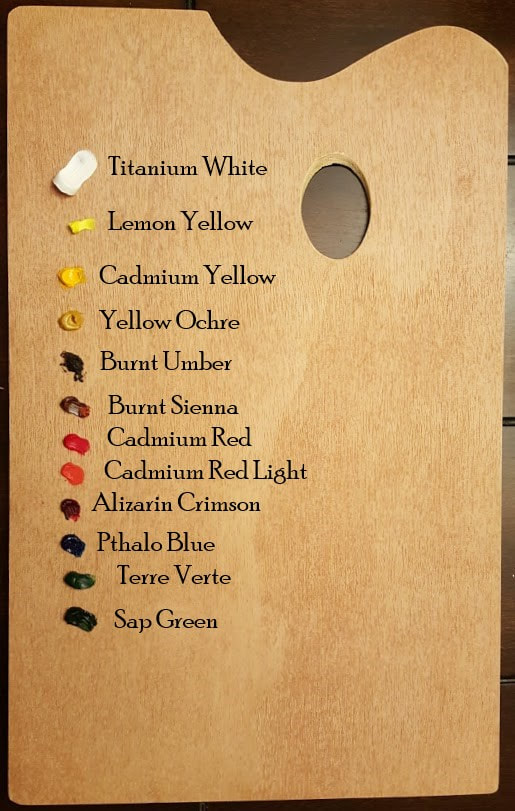
This is my palette. I use these colors in combination to create all other colors. On occasion, I'll add lamp black, but it's a rare occasion.

Class #7: More color mixing and Modelling in Light and Shadow

This class will begin with a color mixing exercise. Choose a major object in your composition. Mix the main color of the object. Mix a couple of tints and a shade of the color. 
​
Now, on a scratch paper, practice making different marks with your paint. Draw an S curve on your paper and paint up to one side with a sharp line. Paint your main color beside a tint, and then use x marks with a flat brush to make a soft edge. Finally, practice using a soft brush with plenty of paint to apply paint that just sits on the surface and doesn't disturb the paint underneath. 

Now, on to the still life painting. Most of your class time will be used for painting today. I will circulate around and help advise and solve any problems that come up.
Hopefully, your painting was covered with the first layer of paint in the last class. Now you will choose an object that interests you and use thicker paint to build in detail. When applying paint over wet paint, choose a brush with soft bristles and apply the paint with a gentle touch, so as not to disturb the layer underneath, as in the warm up exercise. This is only your second pass, so it won't be perfect. 


Class #8: Surface Quality of the Paint

​Rembrandt was a master at surface quality. We will discuss his use of contour line and when to blend and when not to. 

This is not a painting video, but Stan does an excellent job of explaining which details can be left out to emphasize the forms that are important to your painting.

'Beauty is Truth, Truth Beauty' - That is all ye know on earth and all ye need to know.
John Keats


  • HOME
  • WORKS
  • PURCHASE
  • ABOUT
  • BLOG
  • SHOWS AND EVENTS
  • Classes
    • Landscape Painting
    • Trompe L'oeil Online
    • Painting Water in the Landscape
    • Portraits in the Style of the Old Masters
  • Murals
    • Clarence "Tom" Ashley
    • Birth of a Ballad: The Capture of Tom Dooley
    • First Sunrise: Fred Price, Clint Howard, and Sons
    • Historic 1925 Fiddler's Convention
  • CONNECT
  • PORTRAITS